
In some rare instances, it may be required to remove all traces of iTunes from your computer. Use the following steps to remove iTunes from Mac OS X.
Note: If you are having issues with iTunes or other applications, you should first run Disk Utility. iTunes library content such as music, videos, and iPod games are saved in your Music folder by default and are not deleted by removing iTunes or it's associated files and folders. If you are having issues with content of your iTunes library tryre-creating it.
- Quit iTunes.
- In the Finder, choose Go > Applications.
- Locate iTunes and then drag it to the Trash.
- Choose Go > Utilities. If Utilities is not available under Go, then choose Go > Go to Folder, type in/Applications/Utilities/, and then click Go.
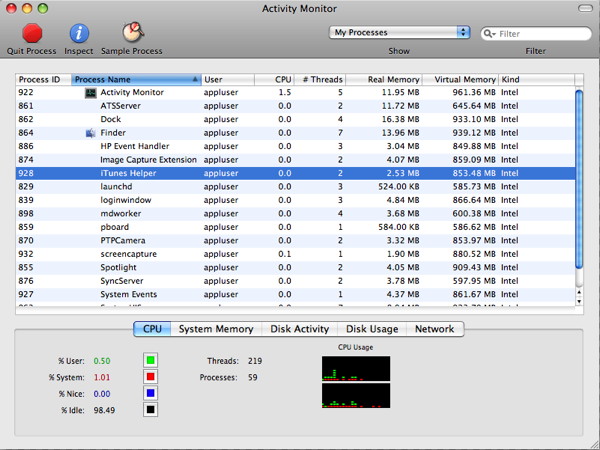
- Open Activity Monitor.
- In the process list locate and select iTunes Helper. Click Quit Process. When asked if you really want to quit the process, click Quit.
- Quit Activity Monitor.
- Open System Preferences (choose Apple > System Preferences).
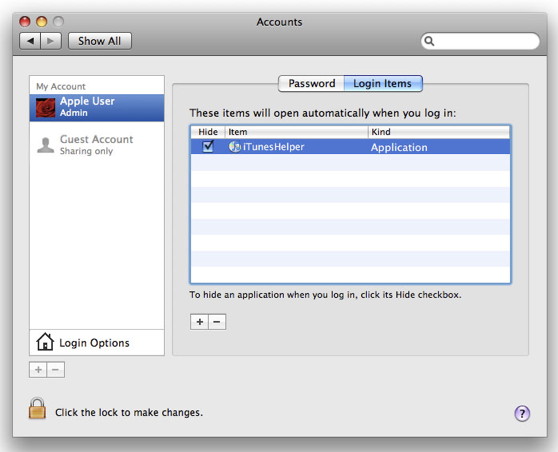
- Choose View > Accounts and then click Login Items.
- Look for the iTunesHelper entry and select it, then click the "-" button to remove it from the list.
- Quit System Preferences.
- From the Finder, choose Go > Go to Folder
- Enter (without quotes) "/System/Library/Extensions" and then click Go.
- Locate the file "AppleMobileDevice.kext" and drag it to the Trash.
- Choose Go > Go to Folder.
- Enter (without quotes) "/Library/Receipts/" and then click Go.
- Locate the file "AppleMobileDeviceSupport.pkg" and drag it to the trash. Note: This file may not be present in Mac OS X v10.6 or later; skip to the next step if this is the case.
- Remove any other file ending with ".pkg" that has iTunes in the title (such as "iTunesX.pkg").
- Restart your Mac.
- Empty the Trash. This should fully remove iTunes.
Additionally, you may need to remove files and folders associated with iTunes. Use the following steps to remove these files and folders.
- In the Finder, choose Go > Go to Folder and type in ~/Library/ and click Go.
- Locate the iTunes folder and then drag it to the Trash.
- Choose Go > Go to Folder and type in ~/Library/Preferences/ and click Go.
- Locate the preference files that have names beginning with com.apple.iTunes and move them to the Trash.
File Names should be:- com.apple.iTunes.eq.plist
- com.apple.iTunes.plist
- com.apple.iTunesHelper.plist
- Choose Go > Go to Folder and type in /Library and click Go.
- Locate the iTunes folder, and then move it to the Trash.
- Choose Go > Go to Folder and type in ~/Library/Preferences/ByHost/ and click Go.
- Locate the preference files that have names beginning with com.apple.iTunes and move them to the Trash.
- Empty the Trash. This should fully remove the files and folders associated with iTunes.
To reinstall iTunes please download and install the latest version.
No comments:
Post a Comment